
I will tell you the secret, my friend. Lean in close, no one can know but you and me....
*you have to crochet in rounds*
SHHH!
Okay, now that I got that off my chest, step this way while this message self destructs.
Just kidding, with the painstaking time I took to take pictures of myself crocheting (yes, I said I did it myself, one hand on the camera, which then switches to move the hook and yarn, then back on the camera, repeated several times), then the editing and numbering them so I would remember what order they went in, I would not lightly destruct this message.
That's the question I get most often from friends: how do you crochet a hat? I can only do {scarves, potholders, blanket squares, other things that don't express the crocheted-in-round demension}. Well, here ya go. This is how you do it.
I'm starting from the beginning, and also assuming you know: how to yarn over, what a slip stitch is, and what a single crochet is. If you don't, it's really easy, google it. I wash my hands of you.
Although I do kind of explain it in here anyway.
Every crochet project begins with a loop.
Say hello, Loop.
 Now make a slip stitch out of your loop by yarning over your hook and bringing it through the loop as shown below.
 Don't make it too big, maybe two or three times the width of your hook.
 Now yarn over and make another slip stitch.
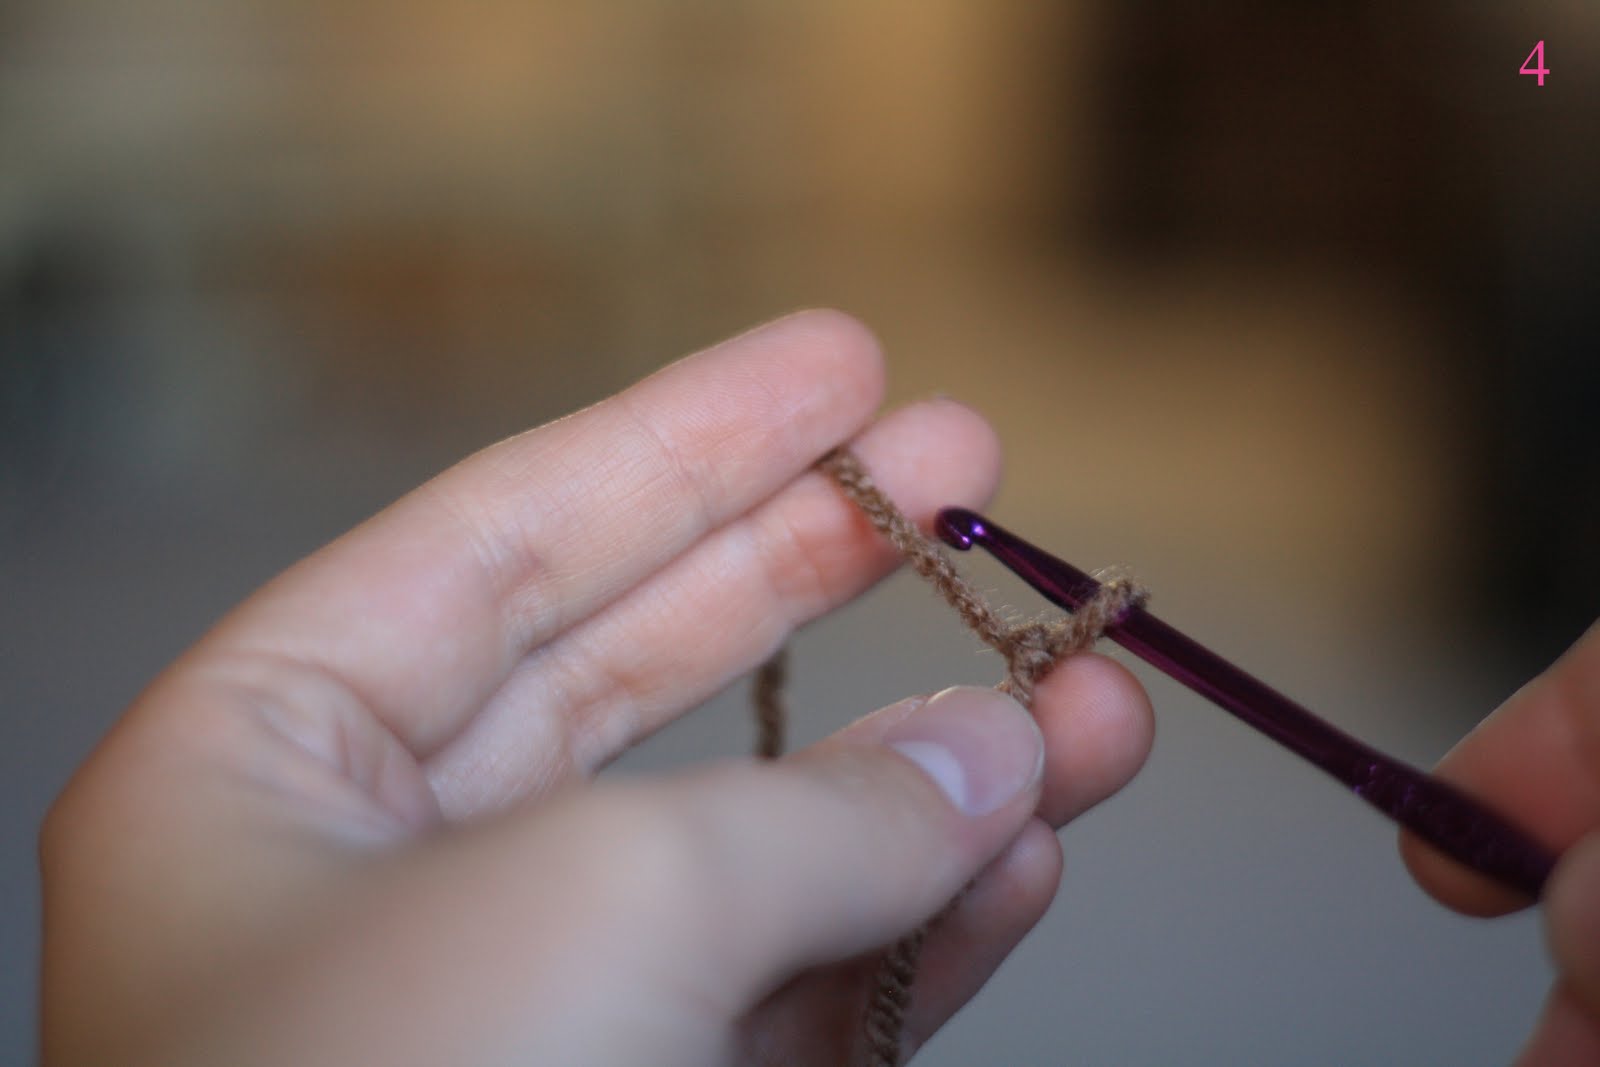

 I think I am channeling Ree Drummond here. This could be a recipe for really yummy cinnamon rolls or beef and snow peas...
Okay, now slip stitch twice more so you now have three lovely slip stitches in a row.

Here comes the mind blowing part, we are going to connect this into a circle by slip stitching back through the first slip stitch you made. So if you've crocheted before, you know what those lovely "V"'s look like when you are crocheting. Find them in your fantastic row and locate the first one. If you have no idea what I'm talking about, look below and hopefully this will help.

You are going to slip your hook through so it goes underneath both parts of the "V" like so:
 Now yarn over and pull through everything ya got, like this:
 Pat yourself on the back if you've made it this far. Your whole world should be on end right about now if you've never done this. It's like that moment in the movie "Contact" where Jody Foster figures out all that alien code they received is actually a map for a worm-hole warping device that will connect worlds together. WHOA!
If you haven't made it this far...well, nice try. Better luck next time.
Just kidding, silly, email me at chelseas_attic@yahoo.com and I will help ya figure it out. Personally. For you.
Okay moving on, now you are going to make your second round. Start with another slip stitch.

 Aren't you glad I took two pictures to diagram that one for you? Just in case you forgot from the beginning of the tutorial and you don't feel like scrolling to the top of the page.
Okay now comes a kinda tricky part. You have to find the hole...the hole...in the middle of the round. You probably won't be able to see it unless you pull the stitches apart a little, or do what I did and just sort of wiggle your hook into the middle until you find the center. I pulled out my hook and "pointed" to the whole for you in the next picture so you can see where it's supposed to be.

Now push your hook through for real, yarn over, and then pull back through.


Beautiful. Now yarn over again, and pull through the two loops like so:

 You have just successfully done a single crochet through the hole in the middle. Let's do another, shall we?


 Happy face. Now do six more until you have completed eight single crochets all together into a nice circle. *NOTE: 8 single crochets will start you off making a very small hat, like newborn or infant sized depending on your yarn/hook size- this is just for practice, but if you are doing it for real and you want a larger hat, do more SC's (single crochets...if you've never read a pattern before) to start off with so that it will end up being bigger*
Now we are going to seal the deal by closing the round. This is my favorite part. Makes everything so neat and tidy. At this point you should have 8 single crochets around in a circle and be back at the slip stitch you started with. I've highlighted it below in pink (the two sides of the V).

Push your hook through the V, then yarn over and pull through the V and your loop, as shown below.

 I usually end up doing that in two steps, pull through the "V", then pull through the loop as it doesn't always just slip through everything so nicely.
 Congratulations, you have your SECOND ROUND completed! You may now start playing "It's a beautiful night" by Ace of Base and do a happy dance.
If you were to continue on in the hat, you would do another slip stitch, then start crocheting two SC's into each stitch around the circle until you come back to your original slip stitch and join the round again.


Sorry to leave you hanging, for those of you who want more, but this is the end of my "How to Crochet in Rounds" tutorial. The next tutorial will cover the very mathematical and very complicated (not really) How to make your hat round down evenly and not ruffle or become a cone-headed hat formula!!! (forumla, formula, formula....)
Ba ba da baaah!
Stay tuned.
No comments:
Post a Comment